Yesterday was a seriously lazy day. I've been a bit under the weather, so I did a lot of laying around, I drank some red wine (I know, I'm bad!) and watched Game of Thrones. :) How was your Sunday?
As you can see, I picked a design (!!!) for my red and blue fabric squares I cut out of the quilt top I found. I knew I wanted little rectangles, so it was just a matter of how I would piece them together. I'm sure this block exists somewhere out in quilterspace, but I did a quick look around and couldn't find anything, otherwise I'd link up some photos of what this might look like as a finished quilt.
It's pretty darn self explanatory so I'll just quickly show ya what I'm doing..
I'm planning on a 56" x 56" square quilt. That'll be 16 blocks (4x4 arrangement) and each finsihed block will be 14" square.
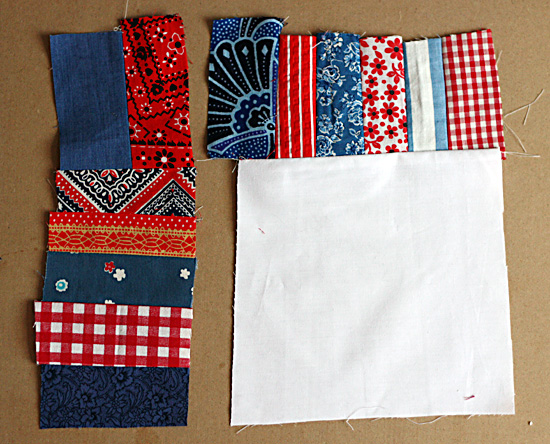
I cut up 2" x 3" (approximately) rectangles, and I'll need about 30-35 per block.
I started with a white block, which I purposefully cut wonky. I figure the blocks will range from 4" to 6" in any dimension, and I'm hoping to make them all different. Then I planned to sew a row of rectangles together and attach it to one of the sides of the white square.
Here is where I got myself into trouble! For whatever reason, the beans knocking around in my brain wanted the block to look like figure "A" above. Looking back I don't know why, I just thought it made sense! I should have realized that figure "B" above makes much more sense, is way easier to sew, and would be the obvious choice for anyone with correctly functioning beans in their brain.
Can you think of a magical (ie easy!) way of making block A?
I sewed my first block (above) the dumb way and it just made things much harder on myself, because I had to match up the seam to make it appear that the blocks on the top went all the way across.
It looks nice, but not worth the extra work. The second block I did (the block shown at the very top of the post) I made the easier way, and I think it looks just as nice. It's a really quick block to make, too!
Isn't it fun taking pictures outside on a windy day! LOL I'm just glad none of the neighbors were outside!
Edit! [Wednesday May 23rd]
I'd like to link this up to Lee's website, Freshly Pieced, as a "Work in Progress." Since I bought some new fabric for the quilt and made a new block, I thought I'd add some more pics:
I want to keep this quilt as low-budget as possible, and use all of the red and blue from the original quilt top I cut up. When I did some quilty math, I figured there wasn't enough fabric, so I bought 6" of each of these prints. It ended up being $12.00, hooray! I think they will mix nicely with what I already have. Just 13 blocks to go! :P
Thank you so much for taking the time to stop by and check up on what I'm doing! :)


Very cute block!
ReplyDeleteThank you very much! :)
DeleteGreat blocks! because your ring is scrappy, you can't really tell the difference. Go with Plan B! Much easier.
ReplyDeleteThanks Lisa, I think you're right, nobody will notice or even think of it. :)
DeleteGreat tutorial! This is a really cute, creative block. I love your blog too. Thanks for linking up to WIP Wednesday! : )
ReplyDeleteThank you so much for coming over to my blog! Such a huge compliment - I think your blog is one of the best. :)
DeleteThanks Patti! I'm go glad you stopped by. :)
ReplyDeleteSuper cute and great tutorial!
ReplyDeleteVery cute block. I actually think I prefer block B.
ReplyDeleteWhat a fun block! Thanks for sharing.
ReplyDeleteGreat block!
ReplyDeleteI love this! Any idea what the fifth fabric from the right in your final picture is? The red with white coral-y looking things on it? I love that!
ReplyDeleteLoving the red, white and blue and looks great in this wonky block.
ReplyDelete